Windows 10 is an amazing and powerful operating system that offers plenty of features most people don’t know about. We want you to get the most out of your computing experience! To this end we recently provided tips and tricks for Windows 10. We now include five more tips and tricks so you can take greater advantage of the latest Windows OS.
1. Establish Restore Points
You can think of a “restore point” as a snapshot of the operating system settings at a given point in time. Windows has the ability to automatically create a restore point before major changes are made to your computer. For example, when you get the latest automatic Windows update your system settings can change.
Be aware, there are situations that arise where modifications, such as PC updates, can cause problems. You can feel safe in knowing that you have the option to rollback your system settings to any restore point. Windows 7 created restore points for your system by default – Windows 10 in some cases is not active. In fact, System Protection may or may not be turned on depending on how you installed Windows 10.
We suggest you follow this easy tip to enable System Protection and have restore points created automatically.
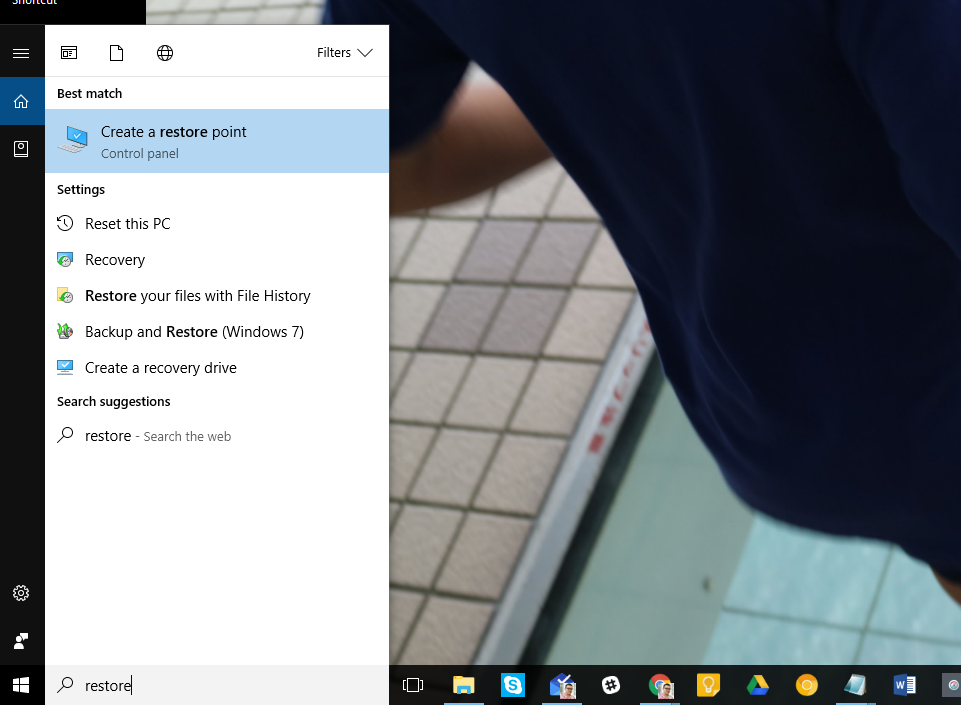
- Right-click the Start icon and select “Search”. From the Cortana search box, type “restore point” and select the “Create a restore point” option as seen here.
- In the System Properties dialog that appears, click the “Configure” button and make sure “Turn on system protection” is selected. Click the “OK” buttons to exit the dialogs and you are done.
2. Schedule Restarts
We find one of the most annoying things about previous versions of Windows was that updates could be downloaded and installed at almost any time – with no warning. For those of us who need our PC running and don’t want to be interrupted with a restart, this was a problem.
Now, with this tip, you can forgo any install updates during a specific window of time each day using the “Active hours” feature. Updates will be downloaded and installed when you’re NOT using your computer.
Here’s how you can make the change:
- Click the Windows Start menu, select “Settings”, and then select the “Update & security” option.
- In the left panel, click the “Windows Update” option.
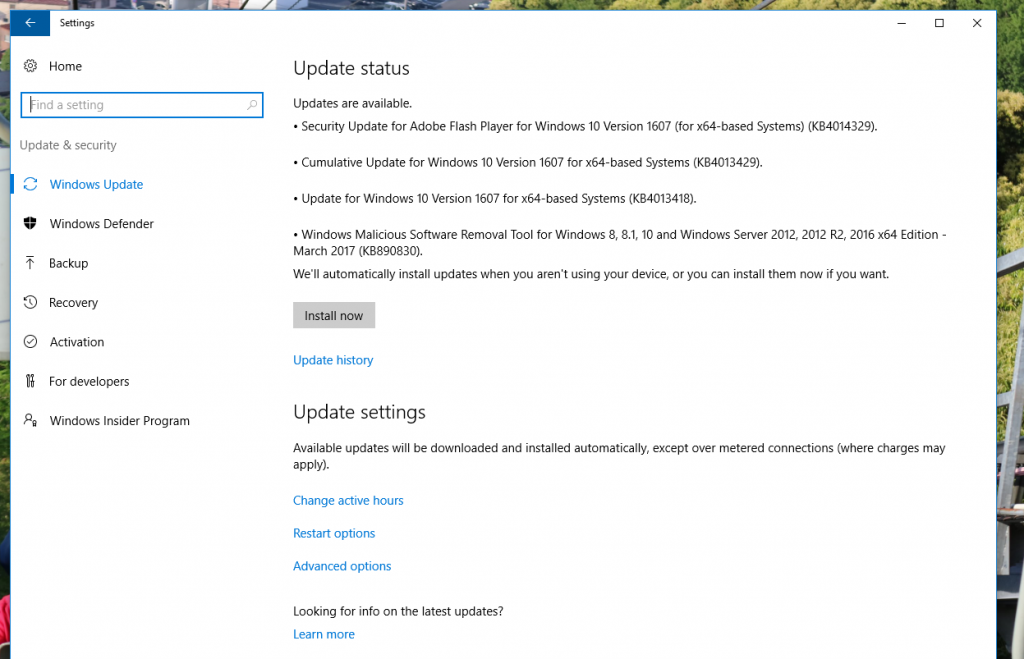
- As seen above, click the “Change active hours” option.
- You can adjust the Start time and End time by selecting the hour of your choice and clicking the check mark. When you are done, click “Save”.
Here are some helpful tips:
- The start-to-end time window must be between 1 and 12 hours.
- The same Active hours are applied for every day of the week.
The Windows 10 Active hours dialog states: “We’ll check to see if you are using this device before attempting to restart.” Keep in mind that in the Settings window you can choose “Restart options” to temporarily override the Active hours and customize a finish time for installing updates.
3. Control Startup Processes
Many Tech experts agree that one of the biggest causes of a slow computer is having too many processes at startup. More specifically, it takes longer for your computer to be ready for use if it has an excessive number of programs to load. However, as with earlier versions of Windows, you can control which programs you want to launch at startup.
In the past, you might have used the MSConfig command. Luckily, Windows 10 provides a more direct path to the Task Manager and make changes to the startup apps.
Manage Startup Processes From Windows 10 Task Manager:
You can begin by launching the Task Manager. To do this, right-click on the Start button and choose Task Manager from the menu. You can also type in “Task Manager” in the search box.
Once the Task Manager launches, click the “Startup” tab.
This displays a list of everything that can launch when you turn on your machine. We advise to pay special attention to the “Status” column as not everything on the list is actually enabled. If an item it marked as “Disabled” you can ignore it as it will not be part of the startup sequence.
If you see any apps that you don’t want to launch at startup simply right-click on the item and select “Disable”.
NOTE: CompuClever makes it EASY to make alterations to startup programs with the “StartUp Management” tool available in PC TuneUp Maestro!
4. How to Get Started Using Cortana
Many new users find Cortana to be one of the more interesting and advanced features included in Windows 10. Cortana is a voice-activated personal assistant similar to iPhone’s Siri provided by Apple.
You can use Cortana to check the weather, set reminders, send emails, find files, search the Internet, and more. Cortana is an example of the great technological advances that have been done in voice recognition software. This might be the first time you use voice commands to do many of your regular PC tasks and you may find it easier and more efficient – especially if you want to muslti-task. You’ll also be getting a more “personal” PC experience.
Cortana requires both a working microphone and speakers as well as an Internet connection. As mentioned, it can be voice-activated, but this means you need to allow Windows 10 to use your computer’s microphone to listen-in on your day-to-day activities. If this is more than you would like – you might want to look into how to turn Cortana on and off or avoid using it altogether.
If you want to get the most out of Cortana, we recommend you check out: 15 things you can do with Cortana as provided by How-To Geek. You’ll be able to take advantage of Cortana’s ability to quickly come up with answers to calculations and conversions. You can have Cortana track flights or packages. Or you can just chat or even get Cortina to sing, tell you a story, or a joke!
5. Collapse the Office 2016 Tool Ribbon
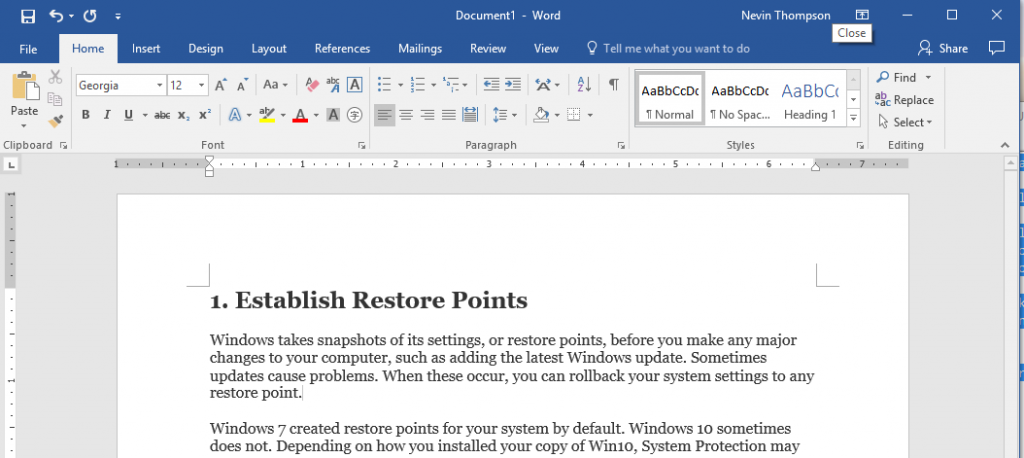
Through the years Microsoft Office has become very comprehensive and powerful. There seems to be a toolbar for almost anything you could ever want to do with a document, spreadsheet or presentation. The problem however, is that on smaller monitors and devices the toolbar ribbons can take over precious screen real estate as can be seen in the image below.
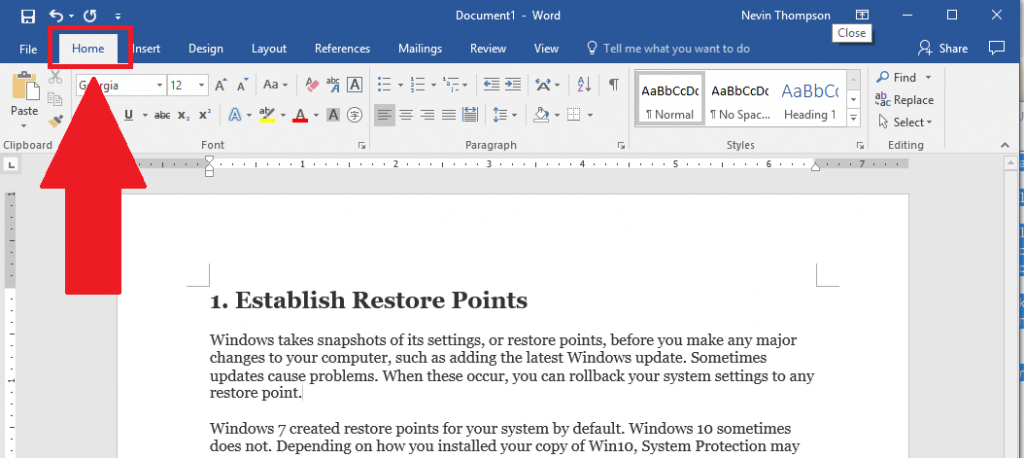
Luckily there is an easy way you can hide the Office ribbon and display it when you need it. To do so, you can simply double-click on the upper tab names, such as “Home”, as seen here:
When you do this the ribbon is hidden. You can display the ribbon once again and pin it in place. You have to double-click on the name tab once again.
That concludes our list of 5 new tips for Windows 10.
More Tips?
Click here to read another 5 Windows 10 tips.
If you have Windows 10 tips you would like to share with us, we would love to hear from you. Please send an email to us at: newsletter@compuclever.com.
In the meantime, stay tuned for more Windows 10 tips and tricks!


