When the box from BloomSky arrived, Andy was quite excited about it. So, I was somewhat surprised when he asked me to set up the unit and document the proceedings. I’m Richard from the Technical Support team and I would think the assumption is that this should be a snap for me, right? The truth is I learn how to do things by repetition – doing them over and over. However, it’s not likely that I would be a good assembly line worker – my strength is working with computers! So, if I can succeed at setting this up… most anyone can.
For those who are interested in joining the BloomSky network, BloomSky is currently offering an unprecedented special promotion to our readers. Simply follow the link and use coupon code: COMPUCLEVER to get up to $40 off when you purchase a solar powered BloomSky weather station.
Disclaimer: CompuClever will not financially benefit from any purchase that may result from this article, which serves as a purely independent review.
Out of the Box:
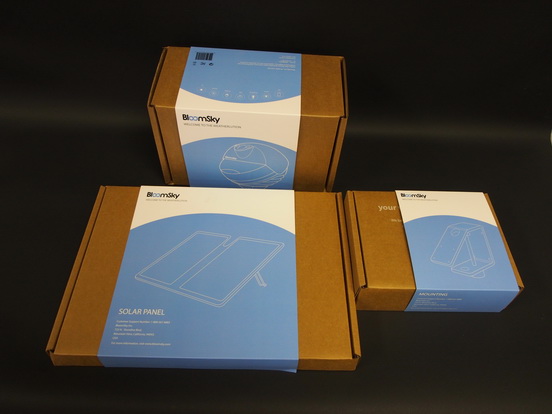
We received the Solar Powered Weather kit that includes both the solar panel and the mounting bracket. To begin, I opened one box to find three smaller boxes as can be seen below. One was for the main sensor, and it included the electrical adaptor and the central mounting pole. The flat box contained the solar panel. The third box (the smallest), had the mounting bracket.
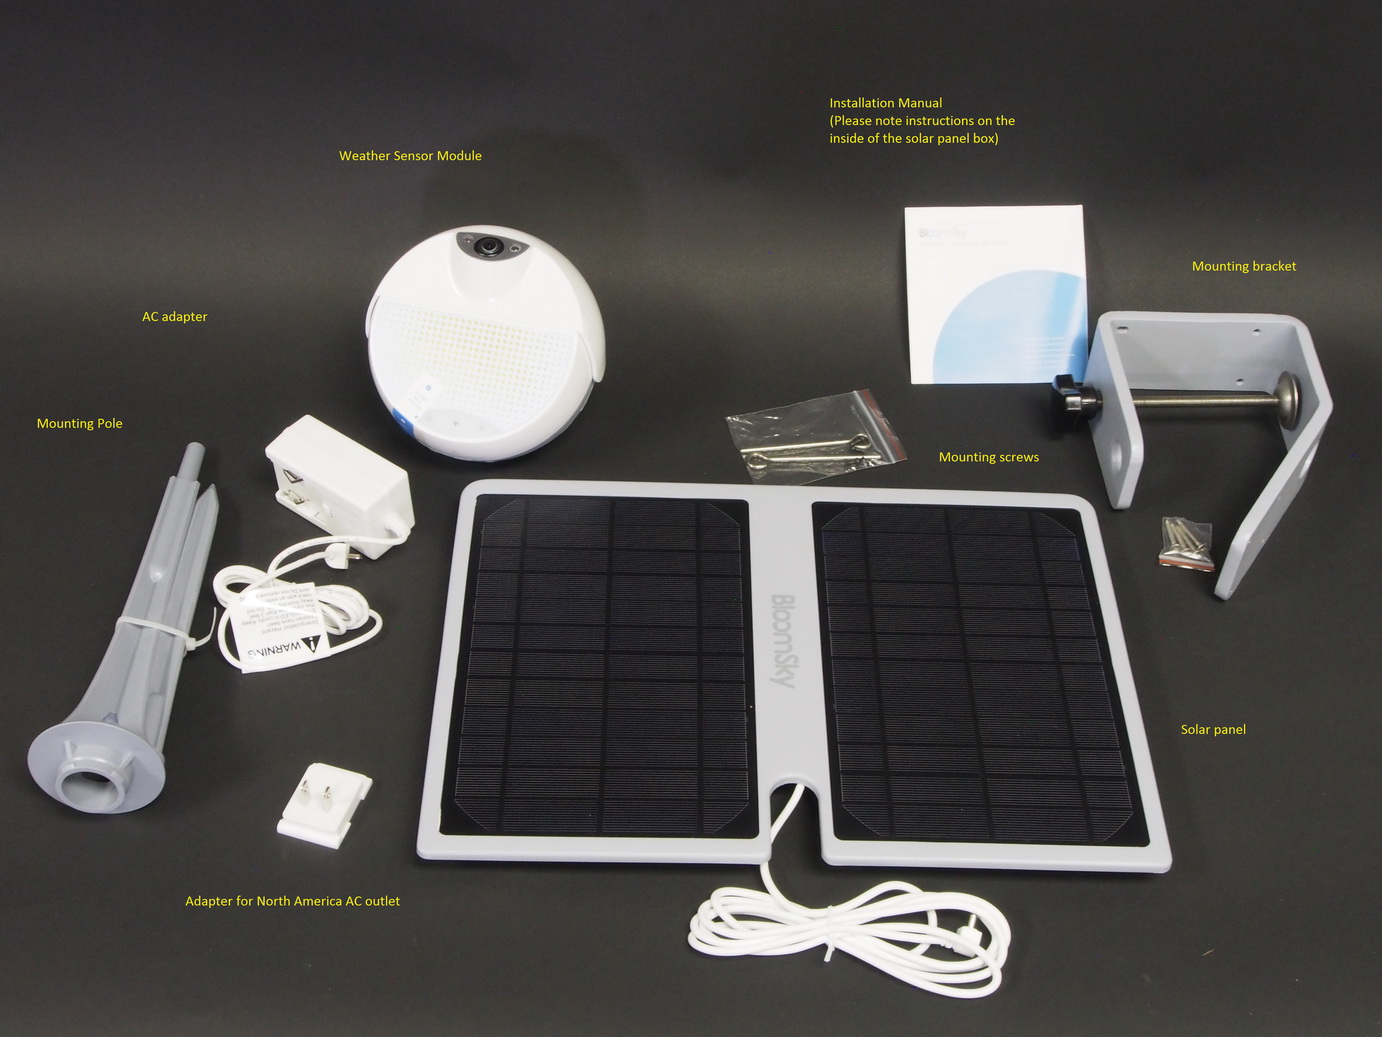
I found a couple packages of screws to help with mounting the assembled unit. Also included is a brief manual to help with setting up the system.
Opening the boxes you will find the following items as depicted in the image below:
- weather sensor module
- mounting bracket
- mounting pole
- AC adaptor
- solar panel (as an alternative power source)
Putting it Together:
The assembly is fairly simple. First, you assemble the sensor unit and the mounting pole. Begin by connecting the two pieces of the mounting pole together. Next, connect the sensor module to the top of the pole. There are four little notches to fit the sensor on the pole (you can see a couple of the guides at the top of the pole in the main picture). Once down, turn the sensor to the side to secure it on the pole.
Now you have to decide whether or not to use the mounting bracket. This really depends on two conditions:
- How you plan to power the sensor unit, and
- The location of the device (Note: distance to your Wi-Fi router needs to be factored in as we mention below).
Keep in mind, these conditions impact one another. If you plan to have the sensor in a place higher up where there is no AC power outlet close by, you have to use an extension cord or consider the solar power option, which necessitates the use of the mounting bracket. Also, if you want to place the sensor at a location where you can’t drive the mounting pole into a piece of lawn or a flowerbed, then you also need to use the mounting bracket.
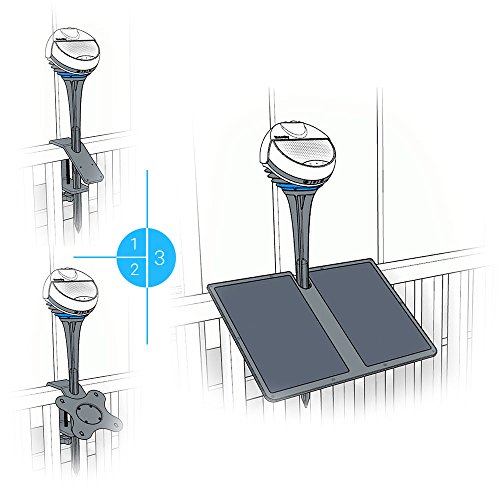
If you have decided to use the mounting bracket, find a place to secure it. You could clamp it over your patio railing, as shown above, or simply screw it to a vertical fixture. If you plan to use the solar panel, there is a mounting plate on the underside of the solar panel. You need to slide it up so you can remove it from the panel and then attach it to the main mounting bracket. There are four small holes on the angled part of the bracket where you attach the plate to the bracket using four dark screws that came with the larger plastic bag as seen in the picture that shows all the parts.
Once the mounting bracket is in place, as seen in part 2 of the illustration shown above, slide the mounting pole (with the sensor unit attached), down through a hole near the top of the angled piece of the mounting bracket and then through a hole near the turn handle on the bracket. Next, slide the solar panel back onto the mounting plate and make certain it is secure, and will not slide off the plate. The notch in the panel denotes the top side of the panel and is necessary for the panel to connect securely when the central pole is in place.
Power Up and Connection
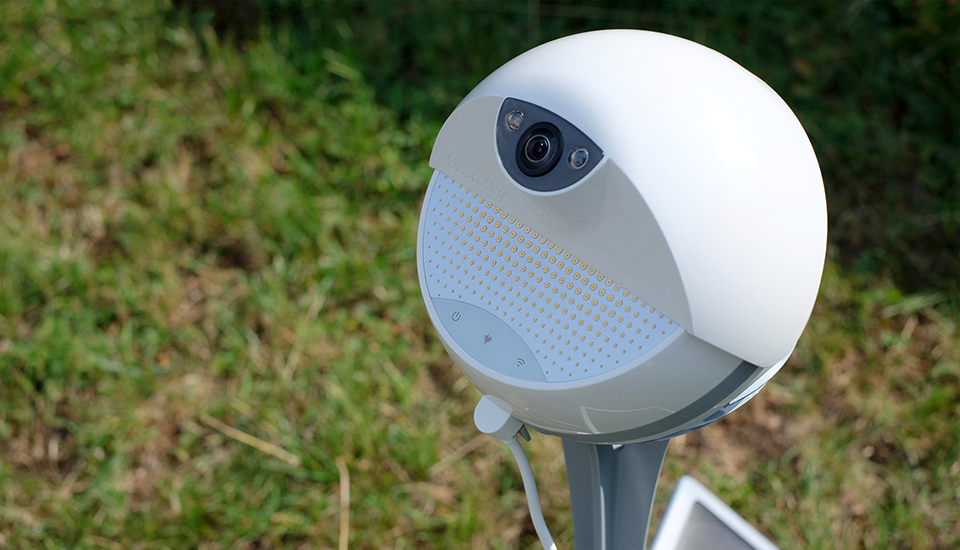
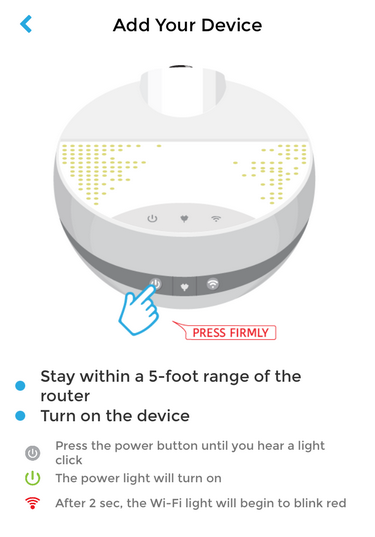
The cable from the solar panel (or the AC adaptor) clicks into a connector at the bottom of the module; you will need to move the cover to the side to insert it. To the left of the power connection is the power switch for turning the module on and off. To the right of that connection is a button to reset the Wi-Fi connection.
Once the unit is assembled and powered up, you can start the process of connecting it to the Internet. A smart phone or tablet (iOS or Android), with an established connection to the Internet is required at this step. You also need to download and install the BloomSky app from either the Apple App store or the Google Play store. Your smart phone or tablet acts like a conduit so that you can use the BloomSky app to connect the weather sensor to the Internet.
Once connected, the app will install and guide you through connecting the sensor to your Wi-Fi and your phone or tablet. You will need to sign on to the router which involves supplying the router name and password. From there it will connect with the sensor and have you up and running in three minutes or less!
Our Review:
We found the assembly to be a straightforward process without any real hiccups. The instructional documentation is brief but doesn’t complicate what is a fairly straightforward assembly. The unit is largely metal so it should stand up to any harsh weather conditions. Also, the clamping system is very sturdy. When put together the unit is secure and not flimsy in any way.
To provide an unbiased and instructive review, we would also like to point out a few issues that we ran into during the installation and configuration process:
- The design of the mounting bracket is somewhat peculiar. Primarily designed as a clamp-on device, it can only be used with a horizontal bar that is less than two inches wide. Given that two-by-fours are the common building material for decks, we couldn’t make proper use of the mounting bracket. We recommend that BloomSky design a different mounting bracket that is not limited by the width of the mounting surface.
- The most “technical” part of the configuration process is likely the part where you connect the sensor module to your Wi-Fi network. In our experience, it took a few timed-out attempts before the unit connected successfully. We attributed the issue to the distance between our unit and the wireless router – about 50 feet apart from each other. So we suggest you take the distance between your Wi-Fi router and the device into consideration when selecting a location to install.
We recommend you read and follow the instructions, as seen above and shown on your mobile app. This includes performing steps in the right order. This should largely reduce the chance of failures and make your installation process a happy experience!
Recommendation to Date
To recap… we are pleased with the BloomSky hardware in terms of ease of assembly, instructions given, and even the quality of the materials / device. The software to connect to the device is easy to understand and to use. For our next article, we will continue our review of the BloomSky technology including our experience with the information it collects such as the time-lapse videos it generates, and we will finish with a complete overall review.
We hope you enjoyed this edition of Gears and Gadgets. We plan to offer our final review and recommendation in the last article of this series available to you in the next few days. Feel free to email us with questions and comments: newsletter@compuclever.com

